- UPDATE October 2020 -
Well, I thought it was about time to go over my "cook book style" tutorial on UV photography again, which I did quite some time ago. I also wrote about the system lens + filter for UV. But meanwhile (2020) things have changed more, even more research has been done, so I thought it would be time for version IV. So here it is, all based on my personal experiences, research and, of course, likes. [last previous update was: 06/2017 about white balancing]
1) get a suitable lens for UV: I made a comprehensive list of lenses tested good for UV here. The truly excellent EL-Nikkor enlarger lens 5.6/80mm and 5.6/105mm (both ONLY the earlier black/chrome version!) have proven to not only have the highest UV transmission, but also to be virtually free of focus shift. Those two and all enlarger lenses without focusing ability additionally need a focusing helicoid. Alternatively get the Novoflex Noflexar 3.5/35mm lens which also has a very high UV transmission, is virtually free of focus shift and allows close-up shots up to 1:2 (0.5x) without additional tubes or helicoids. Both lenses are ($)$$, easy to find and may be suitably mounted to achieve infinity focus. If you need an even higher transmitting, yet rather affordable (unfortunately prices have gone up) but a bit rare lens, get the original KURIBAYASHI or KYOEI 3.5/35mm lens. If you need a true wide angle lens, that's a bit more difficult, but there are some. Still the best and the "industry and scientific standard UV lens" is the discontinued Nikon UV Nikkor 4.5/105mm, or the mechanical + optical identical, still available from stock Tochigi Nikon UV 4.5/105mm (also sold as RAYFACT UV 4.5/105mm). Also still available from stock are the JENOPTIK Coastal Optics 4/105mm UV-Micro Apo and 4/60mm UV-VIS-IR Apo Macro (both unfortunately having some hotspot + mechanical issues) but all those four quartz flourite lenses are a quite costly in the higher $$$$ range, but are a true investment and only fit Nikon cameras directly, but other cameras with easy to find (ONLY lensless!!) adapters. The new mirrorless Nikon Z and Canon EOS M cameras have much shorter register lengths (flange focal distance of 16mm resp. 18mm), now allowing lenses not useable before! And then there are the FF cameras of the L-Mount Alliance (Leica, Panasonic, Sigma) with 18mm resgister. [upd 10/2020]
2) get a suitable filter: The 2" Baader U-filter still today is the best filter you can get, better than 80% and 325...395nm transmission band, IR excellently suppressed below 1.0exp-3 (OD3), which is important for most DSLRs due to their high IR and low UV sensitivity, especially if your camera has the internal filter removed. Be prepared to expose 8-10 stops more (newer cameras 6-8 stops) than normal. My usual setting on an sunny to overcast day is 2...4" @ f8-11 ISO200 using an older type Nikon D70 or converted D200 but 1/2-1/4" @ f8-11 ISO400 on a converted Panasonic Lumix mft camera. Modern converted cameras have lifeview for UV, which also works considerably well in A-mode and using those purely manual lenses. Best is to have that filter built into a filter slider (from astro shops, unfortunately not for lenses with rotating front) or a Nikon AF-1 gel filter holder, which needs a 60mm (male) - 48mm(female) and 48mm (male) - 52mm (female) step ring to mount the filter inside and also allows to mount a 52mm sunshade outside. That contraption allows to flip down the filter, adjust focus, take a VIS shot if needed for comparison studies, flip up and take a UV shot. Magnetic filter holding ring sets (Manfrotto XUME) are a rather new development, which works very well and saves quite some time (I only use those now). But also screwing in and out of the UV filter works reasonably well, if done with care. Should you have a full spectrum converted camera (with clear fused silica filter/window inside), an external filter which compensates that is needed, so as to be able to shoot normal visible photos with it (as before the conversion). I recommend to use an external 2mm thick SCHOTT S8612, SCHOTT BG40 or SCHOTT BG39 or
Schott BG38 (in that sequence of usefulness) for that purpose and adjust white balance accordingly. Some companies offer such "compensating filters", but basically it is just the filter glass I have mentioned. Cheap UV filter glass from China is being curretly offered, it quality is not great, has streaks in the glass and transmission overall is not as good as SCHOTT or HOYA glass, so personally I stay away from those. For beginners SCHOTT UG11 / HOYA U340 in 2mm thickness stacked with SCHOTT BG40 in 2mm works rather well with approx 60% peak transmission @350nm as a cheaper alternative. Remember to demand from any UV transmitting filter an IR suppression of at least OD3, but better OD4! And btw. DO USE A SUITABLE SUNSHADE in front of the filters (attach also using magnetic adapter rings!) as this increases contrast oftne dramatically and reduces flare! [upd 10/2020]
3) get a suitable UV enabled camera: My finding is that today converted mft (micro four third) or Sony NEX cameras are so far the best cameras for UV and allow a plentitude of lenses using suitable cheaply available adapters. Their short register length (around 20mm) allow to use many lenses which a DSLR cannot use. Still the older type Nikon D70(s) is the best value for money for UV as is the D40, since both work off the shelf unmodified. D80 and D200 work well either as well as teh modern D800/810 ones, [these are older camera types , not recommended anymore] but all need the internal filter exchanged against a clear fused silica filter first (use a professional service for that: maxmax and lifepixel in the US. The Nikon D7000 (and other modern Nikon cameras) has turned out to be a very useful camera for UV, but needs a
converting company, that can deal with the internal IR leakage caused
by Nikon's IR shutter monitor (I have reported about that here in
detail). CANON shooters - it does not work well with older Canon DSLRs, their filters and CMOS chips do not allow to record UV in an acceptable manner (see the test I have published here; extremely long exposure, high ISO, noisy results), but the newer types, due to different sensor seem to work quite well - I have no personal experience with that.There are also monochrome converted Nikon + Canon cameras (with Bayer pattern removed), with an astonishing 6-8 stops higher sensitivity, but the results are of course monochrome images only. Now in 2020 there are even more and better choices, being the mirrorless Nikon Z-series and the Canon EOS M series, as well as the FF L-Mount Alliance (Leica, Panasonic, Sigma [upd 10/2020]
4) get a suitable UV light source: the sun is of course the best, but not always available. Xenon flashes come next as they have a very similar spectrum than the sun has. Most need the front filters removed, some even need the golden UV suppressing coating on the Xenon tube partially (leave a bit on the back or it does not ignite anymore!!) polished off (using fine Cerium oxide powder) or erased using HCL acid (dangerous!!). A well known candidate is the good and cheap Vivitar 285HV flash (use 2 or 3 if needed), as it already has a clear tube and a low trigger voltage which is safe for modern DSLRs. Another one would be the stronger Nikon SB-14 hammer head flash, but here the tube needs polishing for higher UV output. Another alternative are modern UV LEDs, built into LED flashlights, here especially the Nichia 365nm types (the modern Nichia equipped CONVOY S2 is one of the cheapest around $20-30 and are rather small, strong and good). These are available nowadays easily (ebay, amazon etc.), so are easy to use and not that expensive anymore. There are even some with UV filter glass in front, to suppress any visible light leaking (good for UV induced visible fluorescence!). Stay away from other cheap Chinese UV torches, not really worth the money and the claimed tech. data often do not hold. There are also more advanced systems available of course, which even use the most recent 4 dice high power UV LEDs but those (actually all those UV LED torches) are quite dangerous to the naked eye and should only be used be experienced users and ALWAYS USE EYE PROTECTING UV GOGGLES when working with those. Ethically I find it unacceptable to use strong UV LED torches aimed at living beings, even insects etc. as they get blind. [upd 11/2019]
5) get a suitable white balancing disc: to be able to do a custom white balance for your filter/lens/camera combination, see http://photographyoftheinvisibleworld.blogspot.de/2017/06/white-balancing-options-spectralon-r.html as your images without that will come out rather red or violet depending on camera and sensor used. This is needed to be done for EVERY lens + filter combination (and also basically for every changed lighting situation, but not as critical as lens+filter)! Ideally then stored as a preset within your camera and written down to remember. A simpler and cheaper solution is to use VIRGIN WHITE TEFLON for white balancing which is nearly as good. Be reminded to wash all of them with Ethanol, then rinse with purified water and let dry on air AND DO NOT TOUCH THEM ANYMORE except on the rim, as fingerprints leave nasty invisible UV marks which would falsify the white balancing result. SHOULD THIS EVER HAPPEN, repeat the cleaning process above and if this does not work (test by taking an UV image) then SAND IT DOWN with some fine sanding paper (400 grit in Europe) and repeat the cleansing process mentioned above. [upd 10/2020]
6) get a sturdy tripod: you need usually at least 1/2-1/4" / 2...4" [this has reduced considerably using higher but noiseless ISO enabled cameras] exposure time (depending on camera used) in full sun outside, sometimes even longer, which calls for a sturdy setup on a tripod. UV is strongest 90 degrees to the sun where the sky is the bluest; avoid to shoot in bright midday sun, due to high IR content present (although no longer a big problem with the new Baader 2" U-Filter, but still IR leakage may happen in rare cases). Using Xenon flash brings exposure time down to 1/200, but the flash needs to be strong and quite close to the subject, which is not always doable and with living beings I find it ethically unacceptable (as well as using strong UV LED lights for that). A few flashes wilts a flower quickly, so imagine what it does to an animal or insect eye.
7) get a suitable shooting habit: for comparison shots I shoot visual light first and then switch to UV filter and shoot UV with exactly the same framing. Be careful not to move the camera. Should you be using using an older lens which most likely has focus shift, focus closer. This needs to be tested out, my finding is that the f8...f11 position on the DOF scale works best (similar to an IR mark on some lenses) but could also calibrated for that lens (like a IR mark but for UV). Shoot RAW files or high resolution JPEGs. Some Pro's do RAW (I usually don't), but for first tests JPEG will do. Set camera white balance to 2500 degrees Kelvin to avoid a blown red channel (Nikon only) or use UNI white balance.
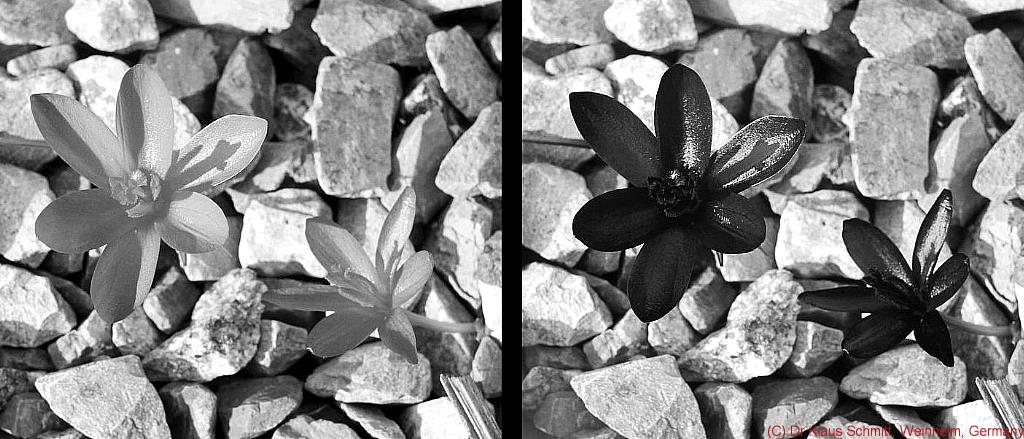
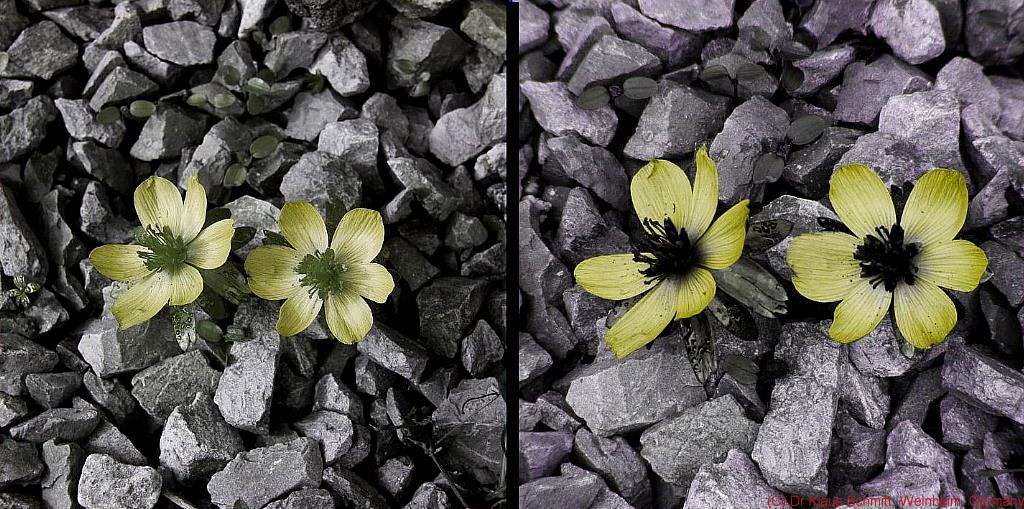
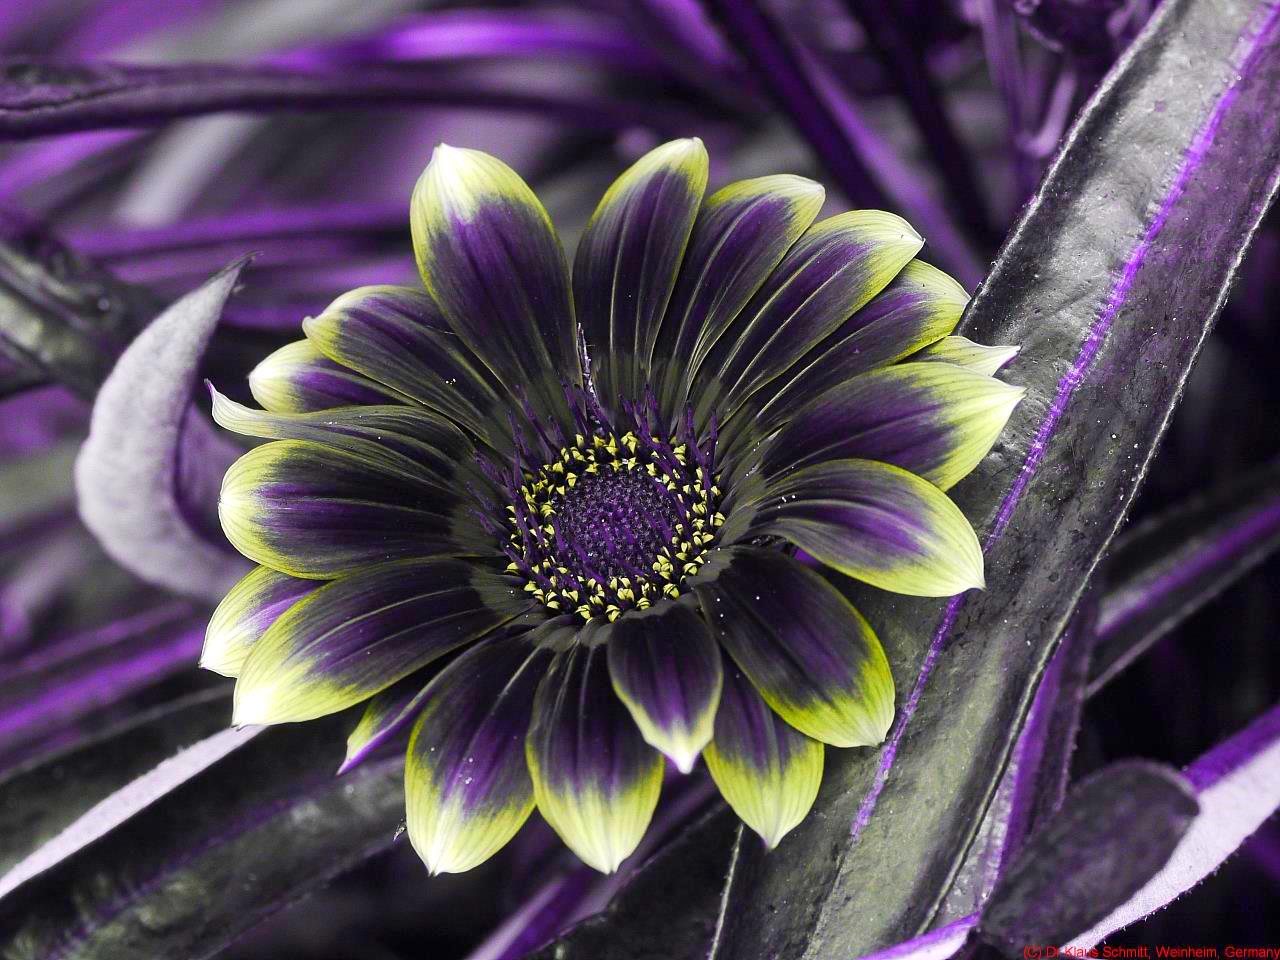
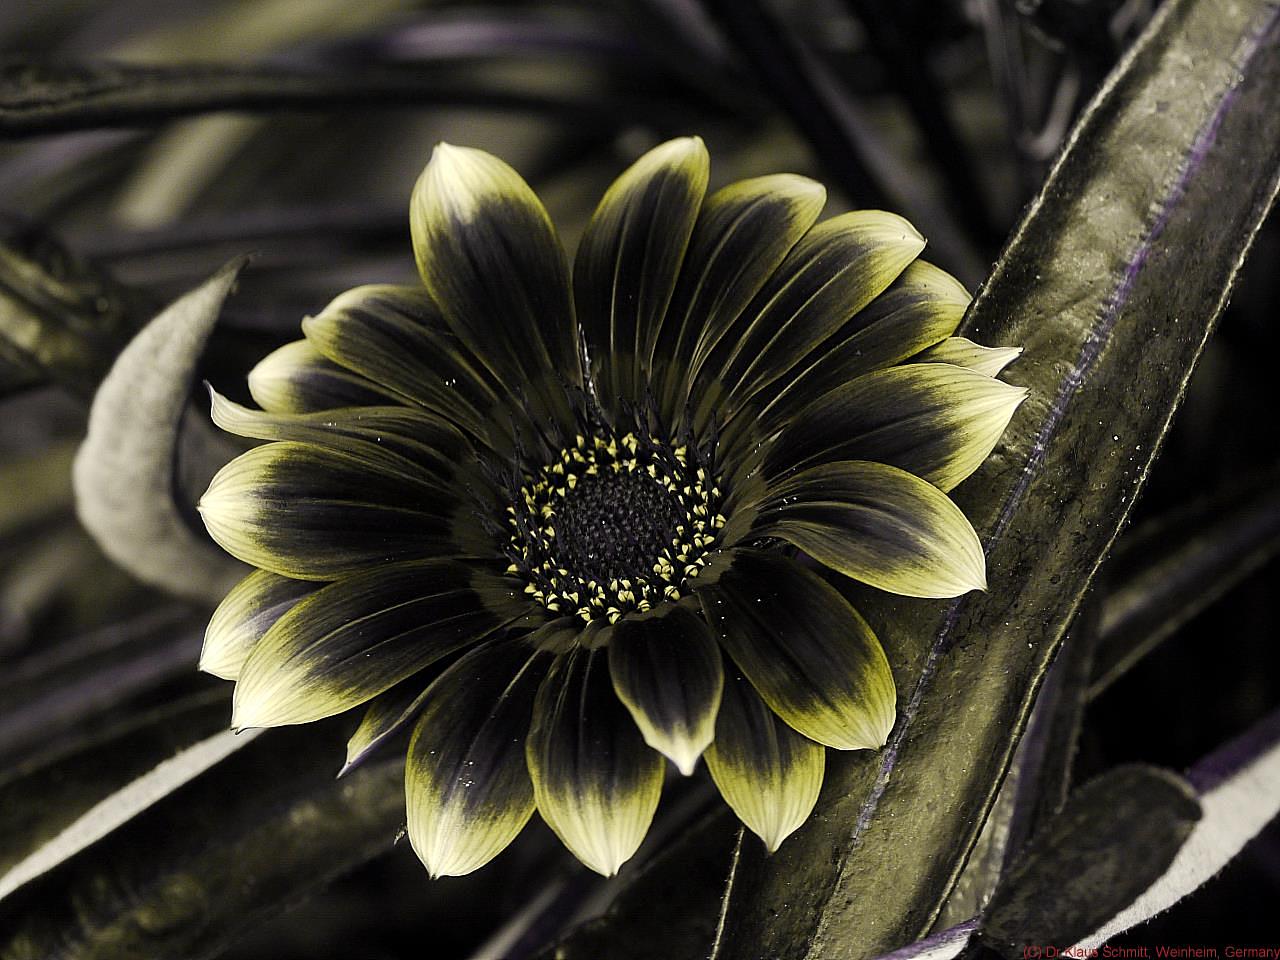
8) get the results processed: Upload pictures to your PC and process them. They will look very red or violet / magenta (if using Nikon DSLRs, other DSLRS produce blue or magenta looking results), but what you see is UV, depending on camera (and only if a good UV filter with no IR leakage has been used, like the Baader-U) . Then either you process them to black/white or white balance them using a Virgin White Teflon disc or a (rather expensive) SPECTRALON (R) target. Then adjust to taste. UV has no "color" by definition, so you may set what you prefer. I have been using BibblePro its "click white" operation and the built in denoisifier. Others are more happy to use Nikon NX-D. Today I use Capture One Pro.
9) get help and discuss results: exchange and discuss your results on one of the few UV forums on the net: UltravioletPhotography.com , nikonians.com, nikoncafe.com and openphotographyforums.com. Quite a bit of my old content resides on the Nikon-only forum nikongear.com.
This is in condensed form the result of some years of research and testing and of course only reflects my personal opinion as of 2020 - others may think differently. No warranty given or implied for all being mentioned here, and YOU TAKE FULL RESPONSIBILITY WHAT YOU DO with that.
If you need some rare equipment, let me know, I may be able to help. I have plenty of filters, lenses etc. available for sale, or may be able to direct to a source.
I also do engineering and photographic consultation on a professional basis about any UV related subject.
All my works shown here on my BLOG, my pbase.com site or my macrolenses.de site carry my copyright, so if you like to use any of my graphs or any of my pictures, please do ask me for my explicit permission first.
Stay tuned, more will follow on that fascinating subject...
More info on this very interesting field may be found on my site www.pbase.com/kds315/uv_photos