Sunday, March 2, 2008

Primula I ... NIR flourescence


I wondered around in my home with my mobile UV LED Lamp in my hands, my UV stopping googles on in search of some unusual effects this strong 365nm UV light might show. A primula plant I just bought catched my attention, since while I was lighting the flowers (the "usual suspects" so to speak...], UV light also fell onto the deep green leaves of that beautiful plant. And to my big surprise, I saw them lighten up in a mysteriously dark glowing red!

I grabbed my camera and took some shots of that effect, using a suitable macro lens (X35) and a UV Cut filter - more about that later, since it turned out to be a nontrivial issue....

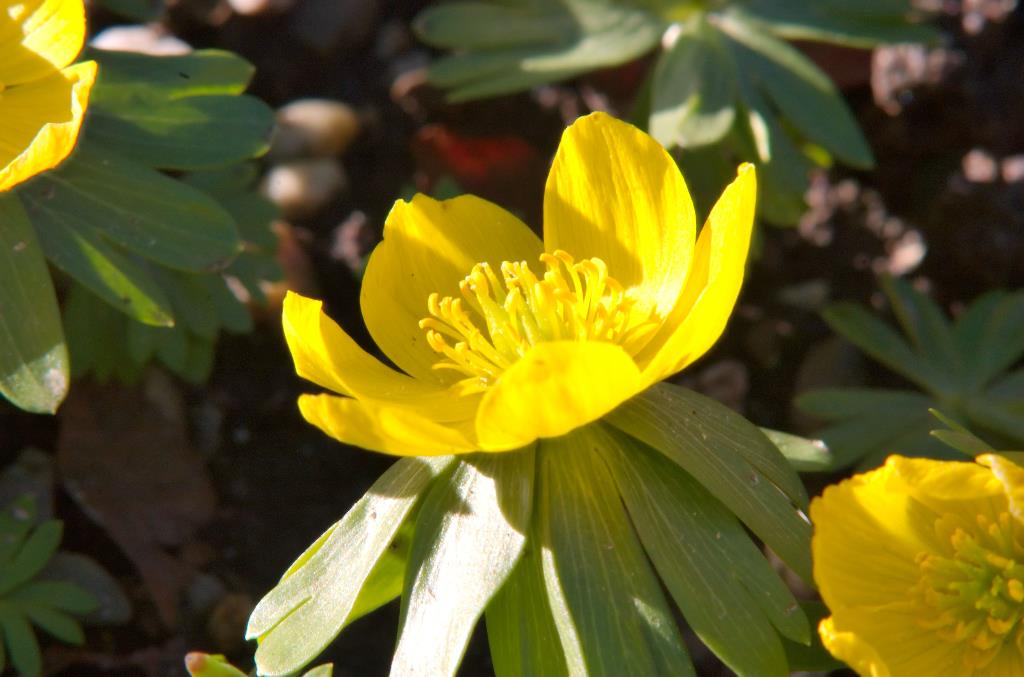
So this is how that plant looked in visible light, well known to most of us: [as usual, a click on an image opens up a larger view]


Switching from visible light to UV light, using my 365nm Nichia UV LED flash/lamp, the scene dramatically changes and that deep red lights up from the green leaves! I used an UV stopping filter in front of the lens, in this case the 2" Baader UV/IR Cut filter.
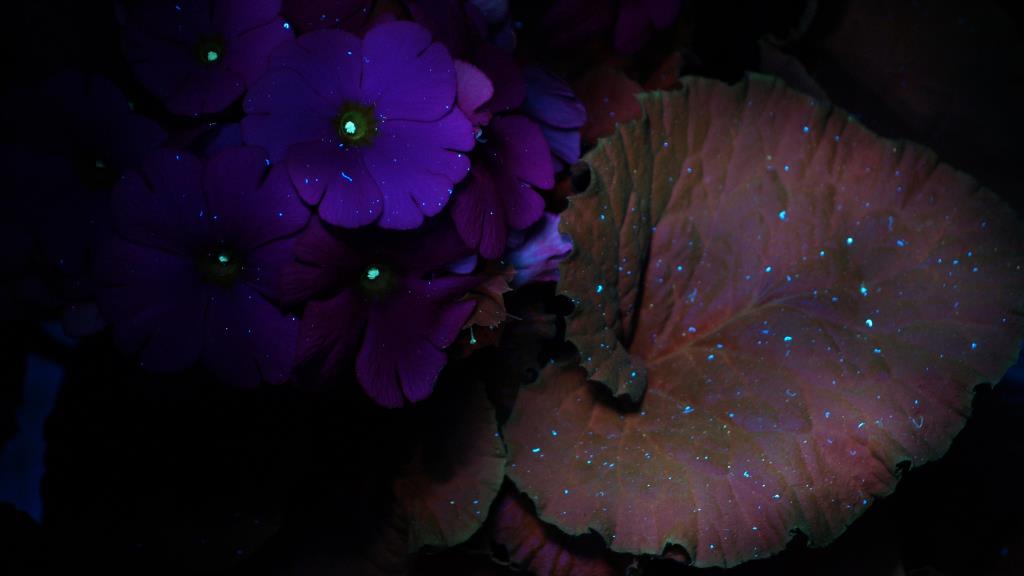


To record that emitted red light in a picture turned out to be nontrivial, since most cut filters I have here also cut off that red light and I just got a grey or greenish color. The spectrometer reveals why this is the case, it starts at about 650nm and extends into the near IR (NIR) region, most of these filter cut off. The only one which worked somewhat was the Baader UV/IR Cut filter. The Canon, Tiffen etc. UV/IR cut filters ("hot mirror") all failed since they are designed to cut off NIR.


But what is that what we see here? It is UV stimulated near infrared (NIR) fluorescence of the green chlorophyll (which is a type of porphyrine we have seen in the egg study I published earlier)!

So I hope you enjoyed that "hidden beauty" of that Primula flower!


Stay tuned, more will follow on that fascinating subject...

More info on this very interesting field may be found on my site http://www.pbase.com/kds315/uv_photos

Primula II ... UV induced visible Fluorescence

So today a flower fell of that beautiful Primula plant. I had bought that for my balcony, since I needed some colors around me after a long a dark winter, which is finally over here in Weinheim / Germany

I grabbed my camera, attached a long extention tube, plus that tack sharp UV Rodagon 60mm lens. This following shot was done using a tungsten cold fiber light: [as usual, a click on an image opens up a larger view]


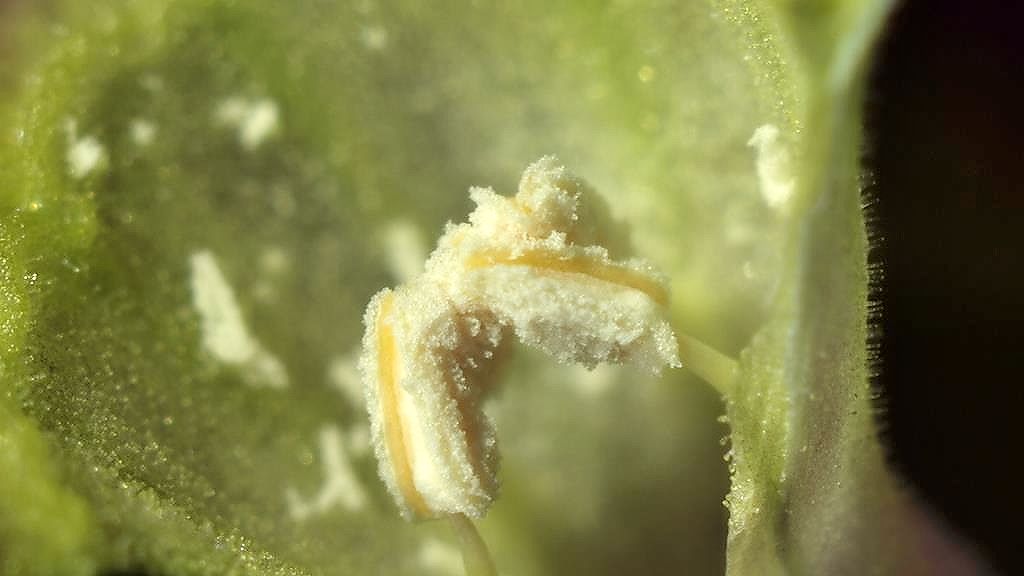
So if we switch from visible light to UV light, in this case using my 365nm Nichia UV LED flash/lamp, we will see the pollen light up blueish / greenish and also the colors of the flower petals change. I had to remember to use a UV stopping filter in front of the lens, in this case the 2" Baader UV/IR Cut filter, which also stops IR light very efficiently, needed for modern DSLRs due to their very high IR sensitivity. This is the result now, called UV induced visible fluorescence, commonly called fluorescence [there are other forms of fluorescence, too, like UV fluorecence, IR fluorescence just FYI].


So lets look a bit more in detail to these wonderful bright blueish/greenish lighting up pollen, first in visible light...


...then using UV light which stimulates flourescence. These shots need to be done in darkness, since that effect is quite weak and needs long exposure times:


So I hope you enjoyed having a look at a flower using UV induced visible fluorescence!


Stay tuned, more will follow on that fascinating subject...

More info on this very interesting field may be found on my site http://www.pbase.com/kds315/uv_photos

Friday, February 29, 2008

Easter is approaching...!

Easter is approaching and quite some shops exhibit the traditional easter decoration. I was curious to see, how that white ostrich egg would look multispectral.

[as usual, a click on an image opens up a larger view]


Now that made me curious and the idea was to investigate the behaviour in terms of fluorescence these eggs (their eggshell more precisely) might show.

A Baader 2" UV/IR Cut Filter was used for the visible and fluorescence light shots, a Baader 2" U-filter for the UV shots together with that calibrated X35 lens I made, the UV Nikkor 105mm and an unmodified Nikon D70.

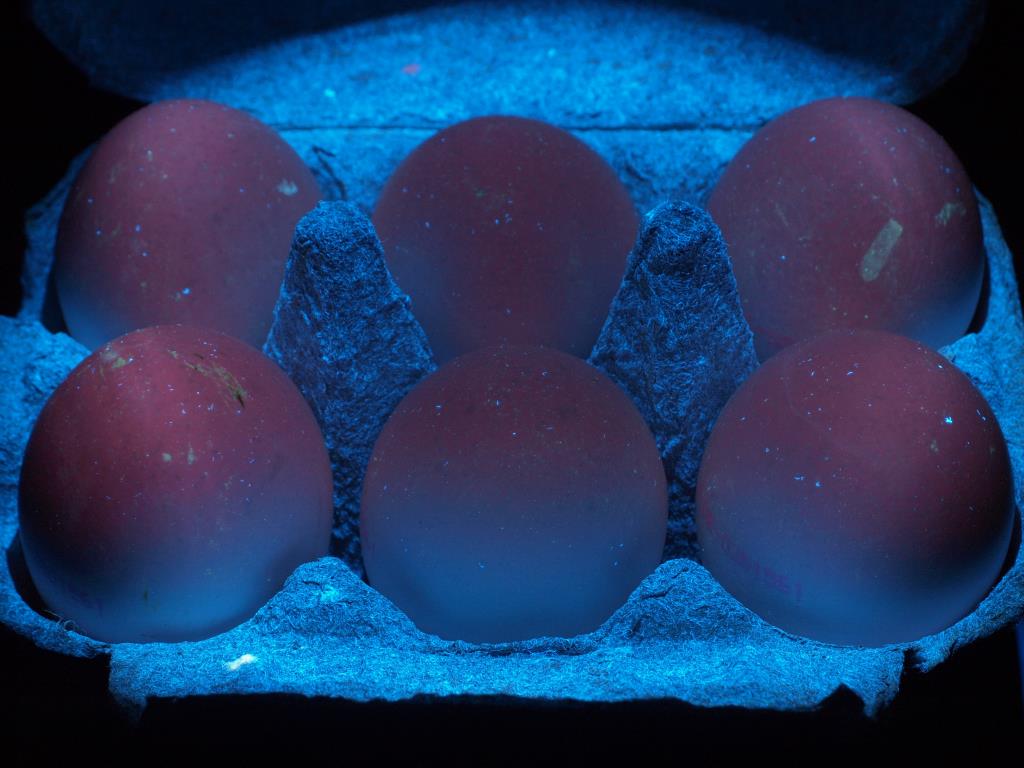
Now the big surprise is, that brown eggs exhibit some very unusual behaviour - they glow mysteriously red if you point a UVA light source to them; in that case here I used my mobile UV LED flash/lamp.


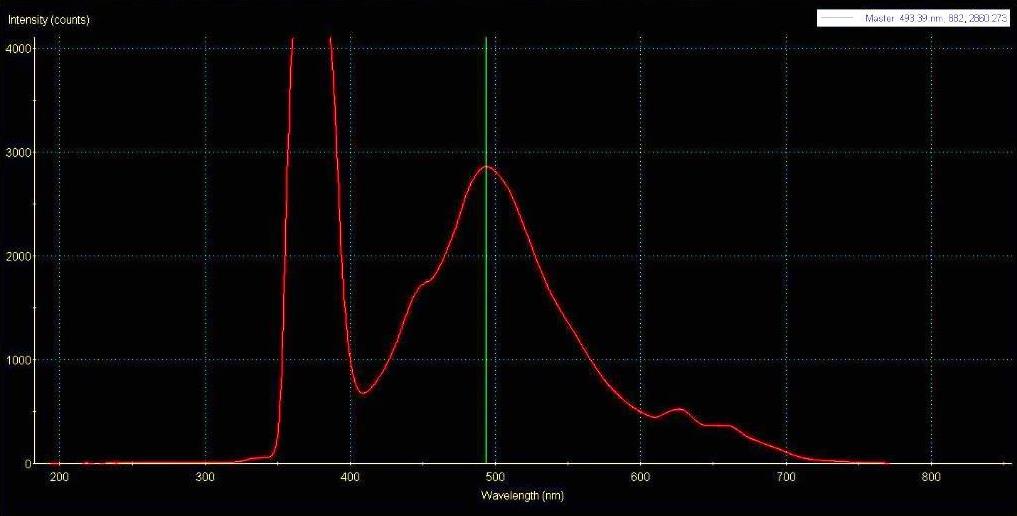
So why is that you might ask. It is UV stimulated visible red fluorescence of the porphyrine contained in the brown eggshells! This can be proven using a spectrophotometer (USB2000 in my case) which measures the reflected and emitted light from that eggshell with a fiber optic probe. The excitation source is quite strong, this is why that 365nm line is way off that graph. You see some response around 480nm (blueish) plus these two red porphyrine peaks at 675nm and a bit weaker 635nm.


Remember the first white ostrich egg shot I showed you above? I wondered if that one would also exhibit that effect, but the visual experience and the spectrophotometer reveals only a strong blueish response around 480nm plus a quite weak peak at around 635nm.


That made me even more curious and I got a fresh set of eggs from another vendor and indeed there it was again, that red fluorescence. Quite weaker but it was there, aside of some strong blueish fluorescence (as with that white ostrich egg):


The spectrometer confirmed these visual findings, the porphyrine response is clearly visible:


So I hope you enjoyed today this more scientific journey with me!


Stay tuned, more will follow on these fascinating subjects...

More info on this very interesting field may be found on my site http://www.pbase.com/kds315/uv_photos

Wednesday, February 20, 2008

X35: Breaking Ice - multispectral


Spring is here finally, but still we have cold nights. When I made use of the fine weather today and that great sun, I found quite some ice in the pond in the Freudenberg park opposite my house ("Hermannshof").

A Baader 2" UV/IR Cut Filter was used for the visible light shots, a Baader 2" U-filter for the UV shots and a B+W 092 IR filter for the IR shots together with a freshly calibrated X35 lens and a unmodified Nikon D70.

The impulsive idea now was, to find out, how differently visible light, ultraviolet and infrared would show the same scene.

[as usual, a click on an image opens up a larger view]

Here now first the visual light shot:


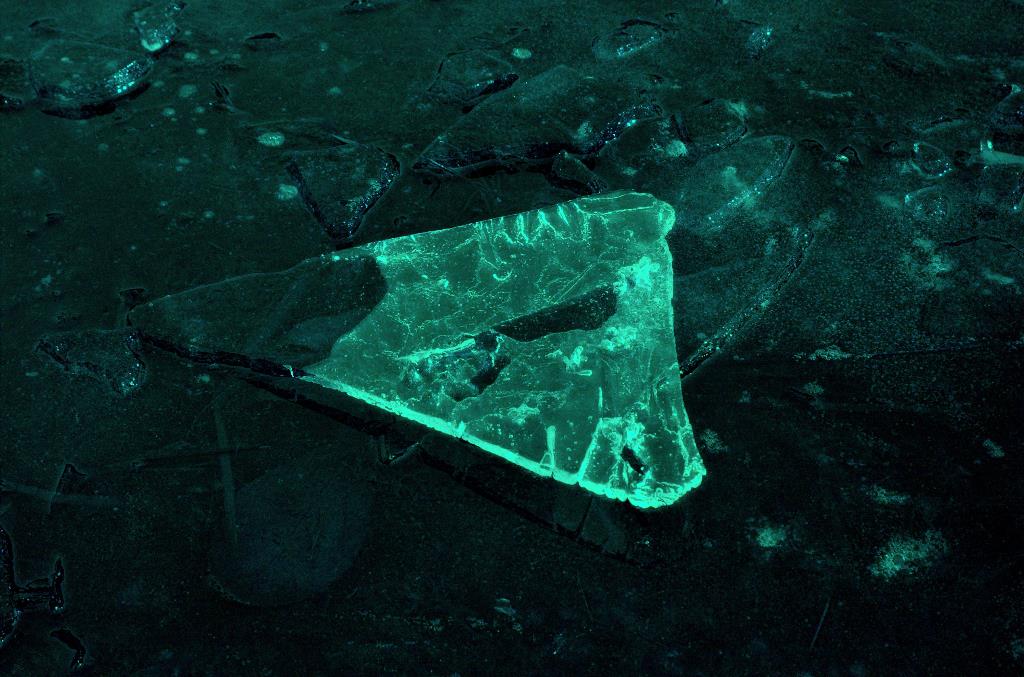
then the shot using the UV filter to get purely reflected UV:


and finally the shot using an IR filter which only allows infrared light to pass:


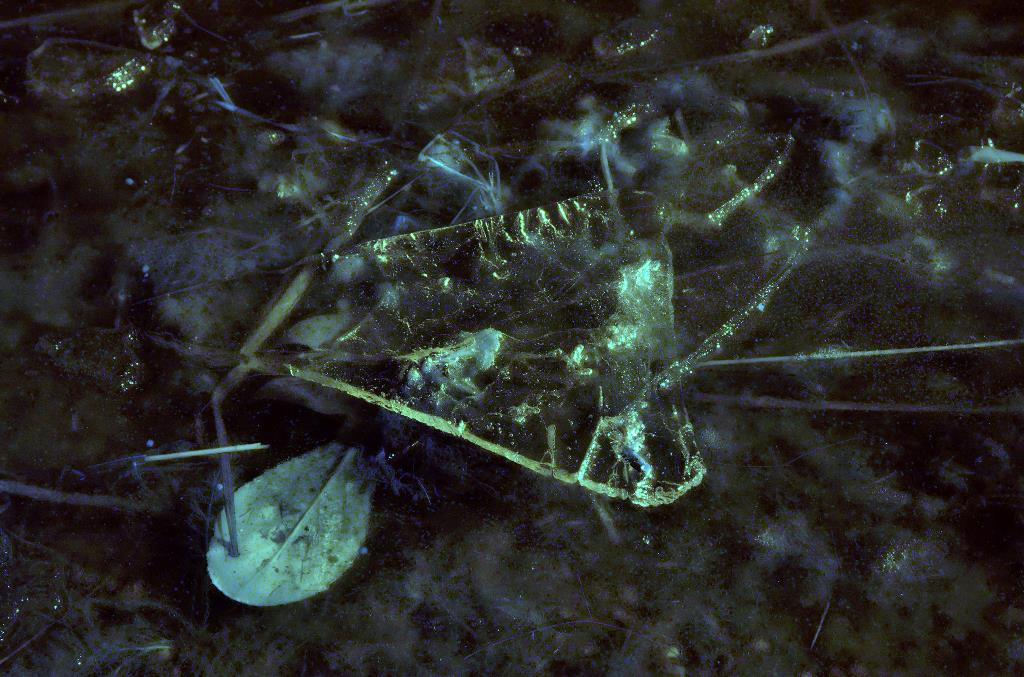
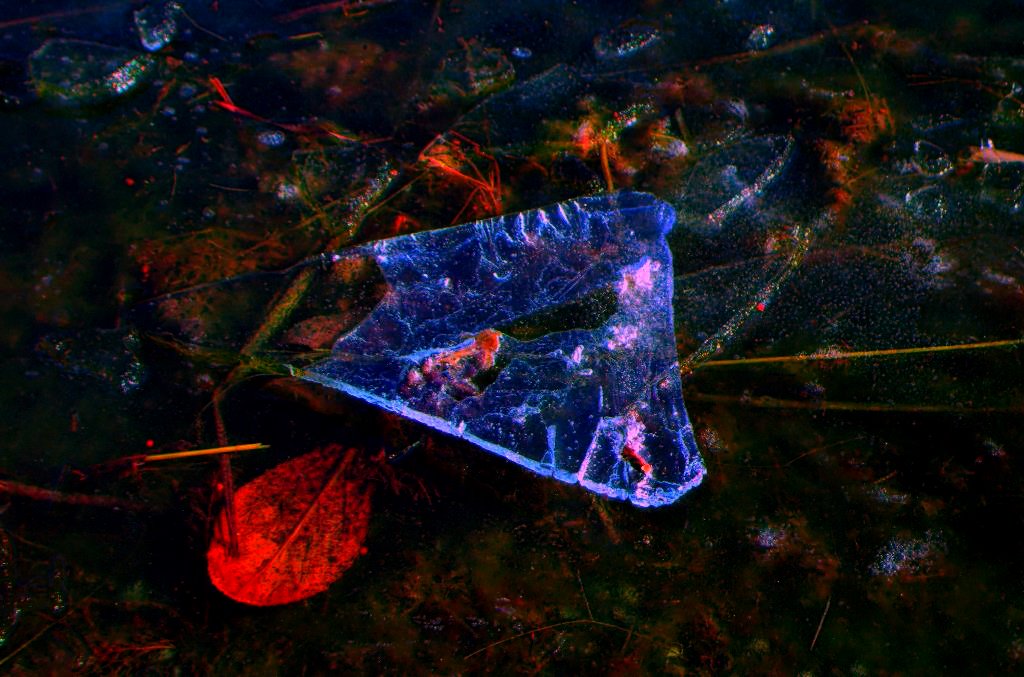
So what have we here now? Using the above three images, the following image was generated through a mapping of the ultraviolet shot to the blue channel (UV->B), the visual shot to the green channel (VIS->G) and the infrared shot to the red channel (IR->R) of the resulting image. This method is called "multispectral imaging" and is used in 
quite a few scientific fields.


Isn't it interesting, how IR contrary to the visual and especially ultraviolet shot penetrates
the ice surface and makes that leaf so clearly visible? UV however bounces back right from the ice surface, so "illuminates" 
the ice nicely.

So I hope you did enjoy this new method!

Stay tuned, more will follow on that fascinating subject...

More info on this very interesting field may be found on my site http://www.pbase.com/kds315/uv_photos
Sunday, February 10, 2008

X135: Spring is here!

Spring is here finally! So I grabbed my unmodified Nikon D70, a tripod, that calibrated X135 UV enabled lens, the great Baader 2" U-Filter mounted on a Nikon AF-1 gel filter holder and a Nikon PN11 extention ring to do some flower shooting in that wonderfully maintained Freudenberg park here across the street in Weinheim/Germany where I live. So enjoy some sets in visual and UV light (visual light / UV)!
[click on image to see a larger version]


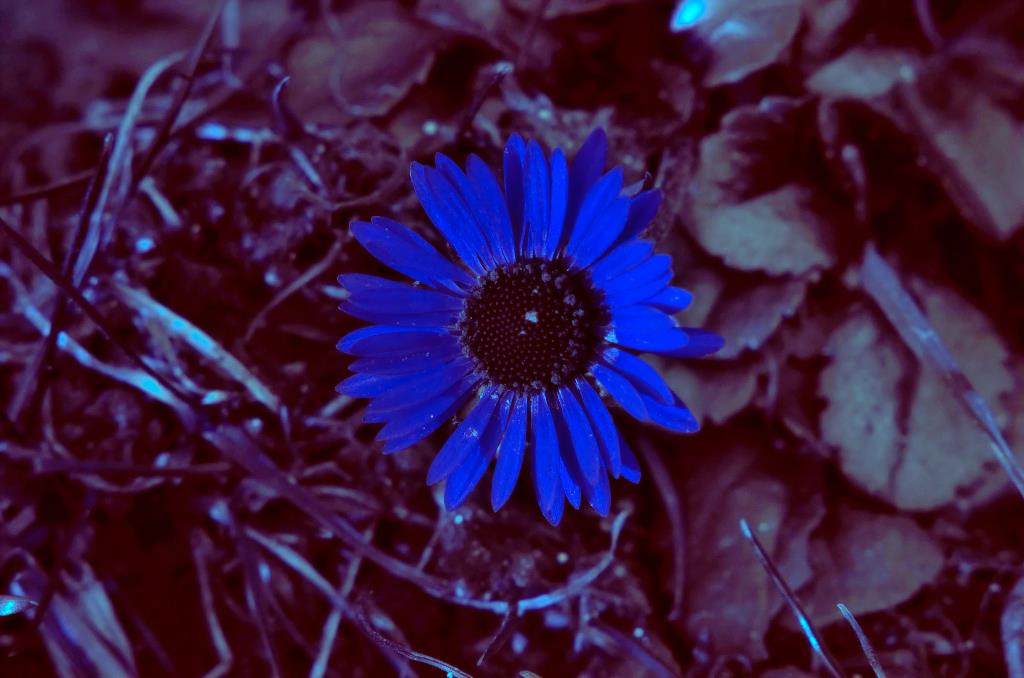
I find it fascinating, how nature has hidden so many beautiful secrets from our human eyes but allows others like bees and insects to see that. Now, modern technology allows us to reveal these secrets. Take the 2nd set for instance: That crocus reveals some interesting UV pattern shown as light patches which are highly UV reflective spots. Insects and bees can see UV, so they will be attracted by that to find the sweet nectar and the pollen. But look closer at the visual light shot. Do you see that very faint blueish spot where the reflective spots on that UV shot are? It is there, we just overlook that so easily....

So I hope you enjoyed a few glimpses of spring 2008 with me!

Stay tuned, more will follow on that fascinating subject...

More info on this very interesting field may be found on my site http://www.pbase.com/kds315/uv_photos

Saturday, January 5, 2008

On the Influence of Wavelength used to Depth of Focus

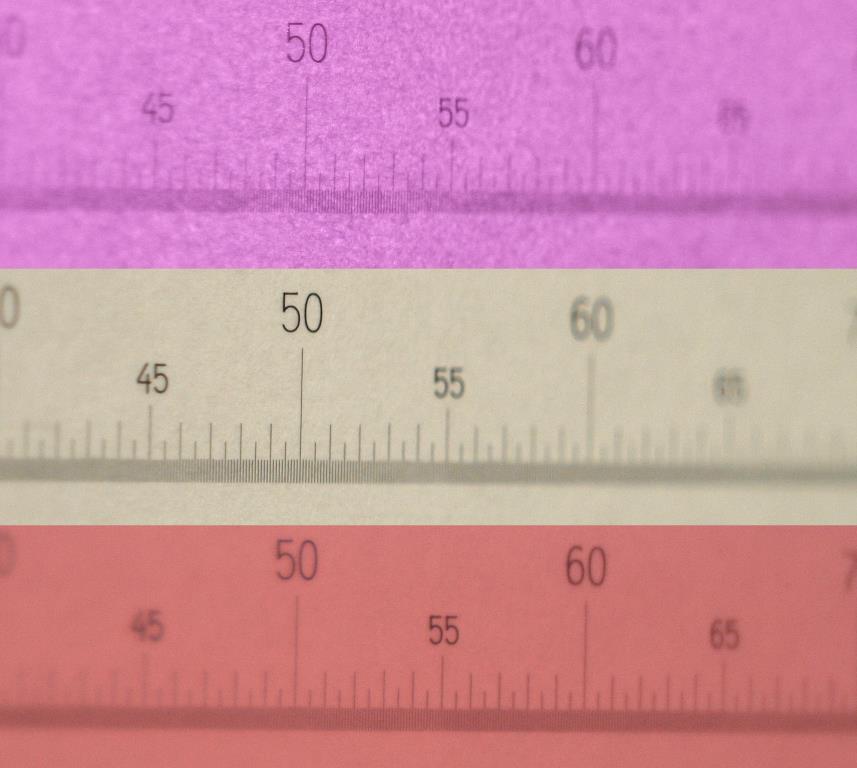
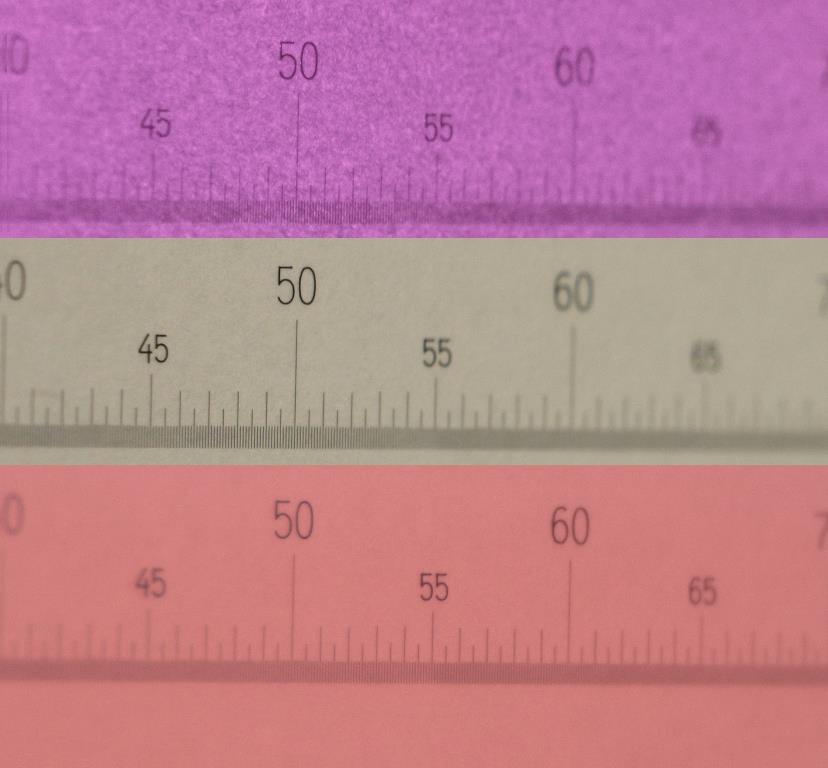
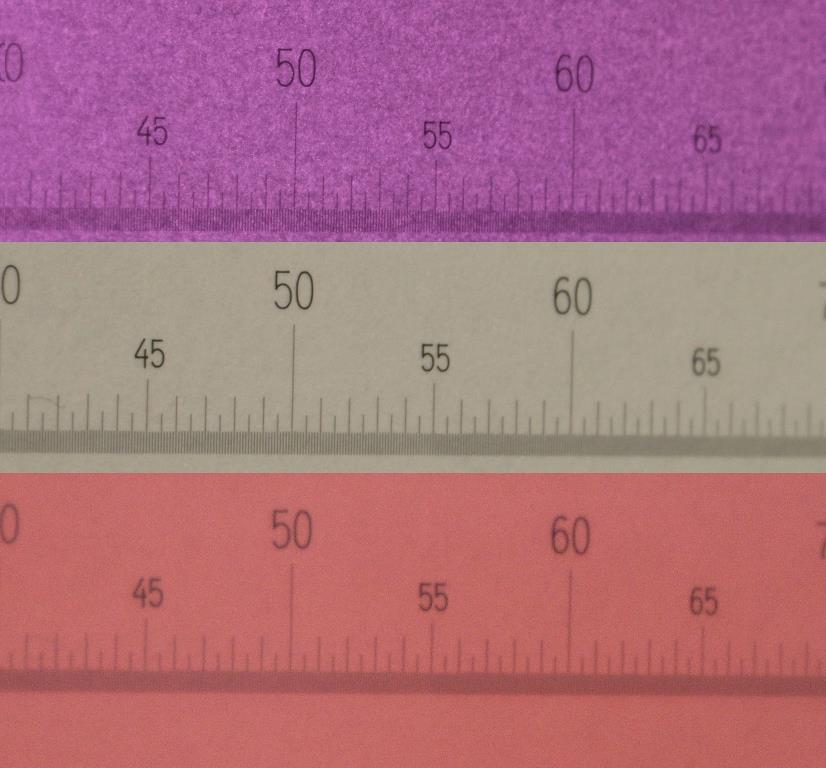
I have been wondering about the fact what happens to the depth of focus (DOF) in multispectral imaging, i.e. what happens if you leave all the same except the wavelength of the light used. The known formulae indicate that if used UV instead of visible light the DOF should get smaller, but there have been experts claiming the opposite. So lets see if real tests confirm the theory or not!.

In all cases the UV Rodagon 60mm served as taking lens, focus was not adjusted between shots.
A Baader UV/IR cut filter was used for the visible light shots, a baader U-filter for the UV shots and a B+W 092 IR filter for the IR shots. Light sources were a tungsten lamp and my Nichia UV LED lamp (365nm).

A precise Carl Zeiss glass ruler served as a target. Distance of focused point to CCD/Chip was 320mm, height of the camera above the target plane was 245mm i.e. the shot was done at an angle of ca 50 degrees.

I tried to keep the exposure constant for the VIS, UV and IR shots while I varied the aperture in the sequence 5.6/8/11/16. Aperture setting was used as a parameter between the shot series.

[as usual, a click on an image opens up a larger view]

1) Visual shot series @f5.6/8/11/16 using Baader UV/IR cut filter [directly from the camera, no modifications except cropped]:


2) UV shot series @f5.6/8/11/16 using Baader U-Filter [directly from the camera, no modifications except cropped]:


3) IR shot series @f5.6/8/11/16 using B+W 092 filter [directly from the camera, no modifications except cropped]:


4) VIS, UV and IR @f5.6 compared:


5) VIS, UV and IR @f8 compared:


6) VIS, UV and IR @f11 compared:


7) VIS, UV and IR @f16 compared:


8) IR focus correction @f5.6 by moving back 1mm camera/lens:


So what did we learn here:
a) using UV light instead of visible light indeed leads to a narrower DOF as compared to VIS
b) using IR light instead of visible light indeed leads to a larger DOF as compared to VIS
c) the lens used shows a neglectable focus shift (i.e. no) for UV
d) there is some IR focus shift of about 1mm or 0.3% of the distance which can be easily compensated by moving the camera/lens back by 1mm (the lens, however, was never designed for being used at IR)
e) the lens shows some contrast degradation when used for IR (the lens, however, was never designed for being used at IR)

Stay tuned, more will follow on that fascinating subject...

More info on this very interesting field may be found on my site http://www.pbase.com/kds315/uv_photos

Extracting useful Information out of Multispectral Images: an attempt

I thought about how multispectral imaging could lead to the enhanced extraction of useful information aside from the fact that unusual, strange or even weird colored images might be produced.

Let's for the moment concentrate on the extraction of information here and the way to present that in a way to make it clearly visible, even to the unskilled reader.

Since it is still cold and dark here, I used a Phalaenopsis orchid flower as the target.

In all cases the UV Rodagon 60mm served as taking lens, focus was not adjusted between shots.

[the following example is intended as a quick demonstration and far from perfect in terms of alignment due to movement, noise etc. Further, I'm not a biologist, so my wording is not correct to denote certain plant parts; please bare with me.]

[as usual a click on an image yields a large version]

1) Visual shot using Baader UV/IR cut filter @ISO200 f16:


2) UV shot using Baader U-Filter @ISO400 f5.6 showing strong UV pattern around the pollen area (round tip in the middle), the zebra pattern mound and the front tentacles i.e. strong UV reflection [directly from the camera, no modifications]:


3) IR shot using B+W 092 filter @ISO400 f5.6 showing even distribution of IR reflection with just a fine zebra pattern i.e. IR reflection [directly from the camera, no modifications]:


4) Combination of 1+2 in such a way as to make the strong UV reflection pattern clearly visible in this case shown as blue / turqouise using my differential mapping technique i.e. UV is mapped into the visible space as blue:


5) Combination of 3+4 in such as way as to also include the soft IR reflection patterns and still trying to preserve the info of no. 4 using the same mapping technique but here IR is mapped in as red:


6) This is for comparison the mapping UV-->B, VIS-->G, IR-->R which in my opinion needs a very skilled reader to see these patterns due to additive mixing of false colors (or one could even say it suppresses it to the unskilled reader):


So what do we have here now in the final result:
we clearly see that the flower exhibits a strong UV pattern around the pollen area (which may serve to attract pollinators), the zebra pattern around the "mound" and thse tentacle like parts which otherwise would have not been visible in the white light shot.

The IR contribution to the overall result in this case is quite even and except some soft zebra pattern does not contribute much, so no. 4 could have even served as a final result - in that case.

This case was meant to express my opinion, that if a meaningful result for multispectral imaging in terms of extraction of information is wanted, the method of generating the final result should be chosen accordingly and the way of combining the different spectral images should be governed by that - just my 2 cents.


Stay tuned, more will follow on that fascinating subject...

More info on this very interesting field may be found on my site http://www.pbase.com/kds315/uv_photos